Wheelchair Reference Pack
User Guide
Version 2.0
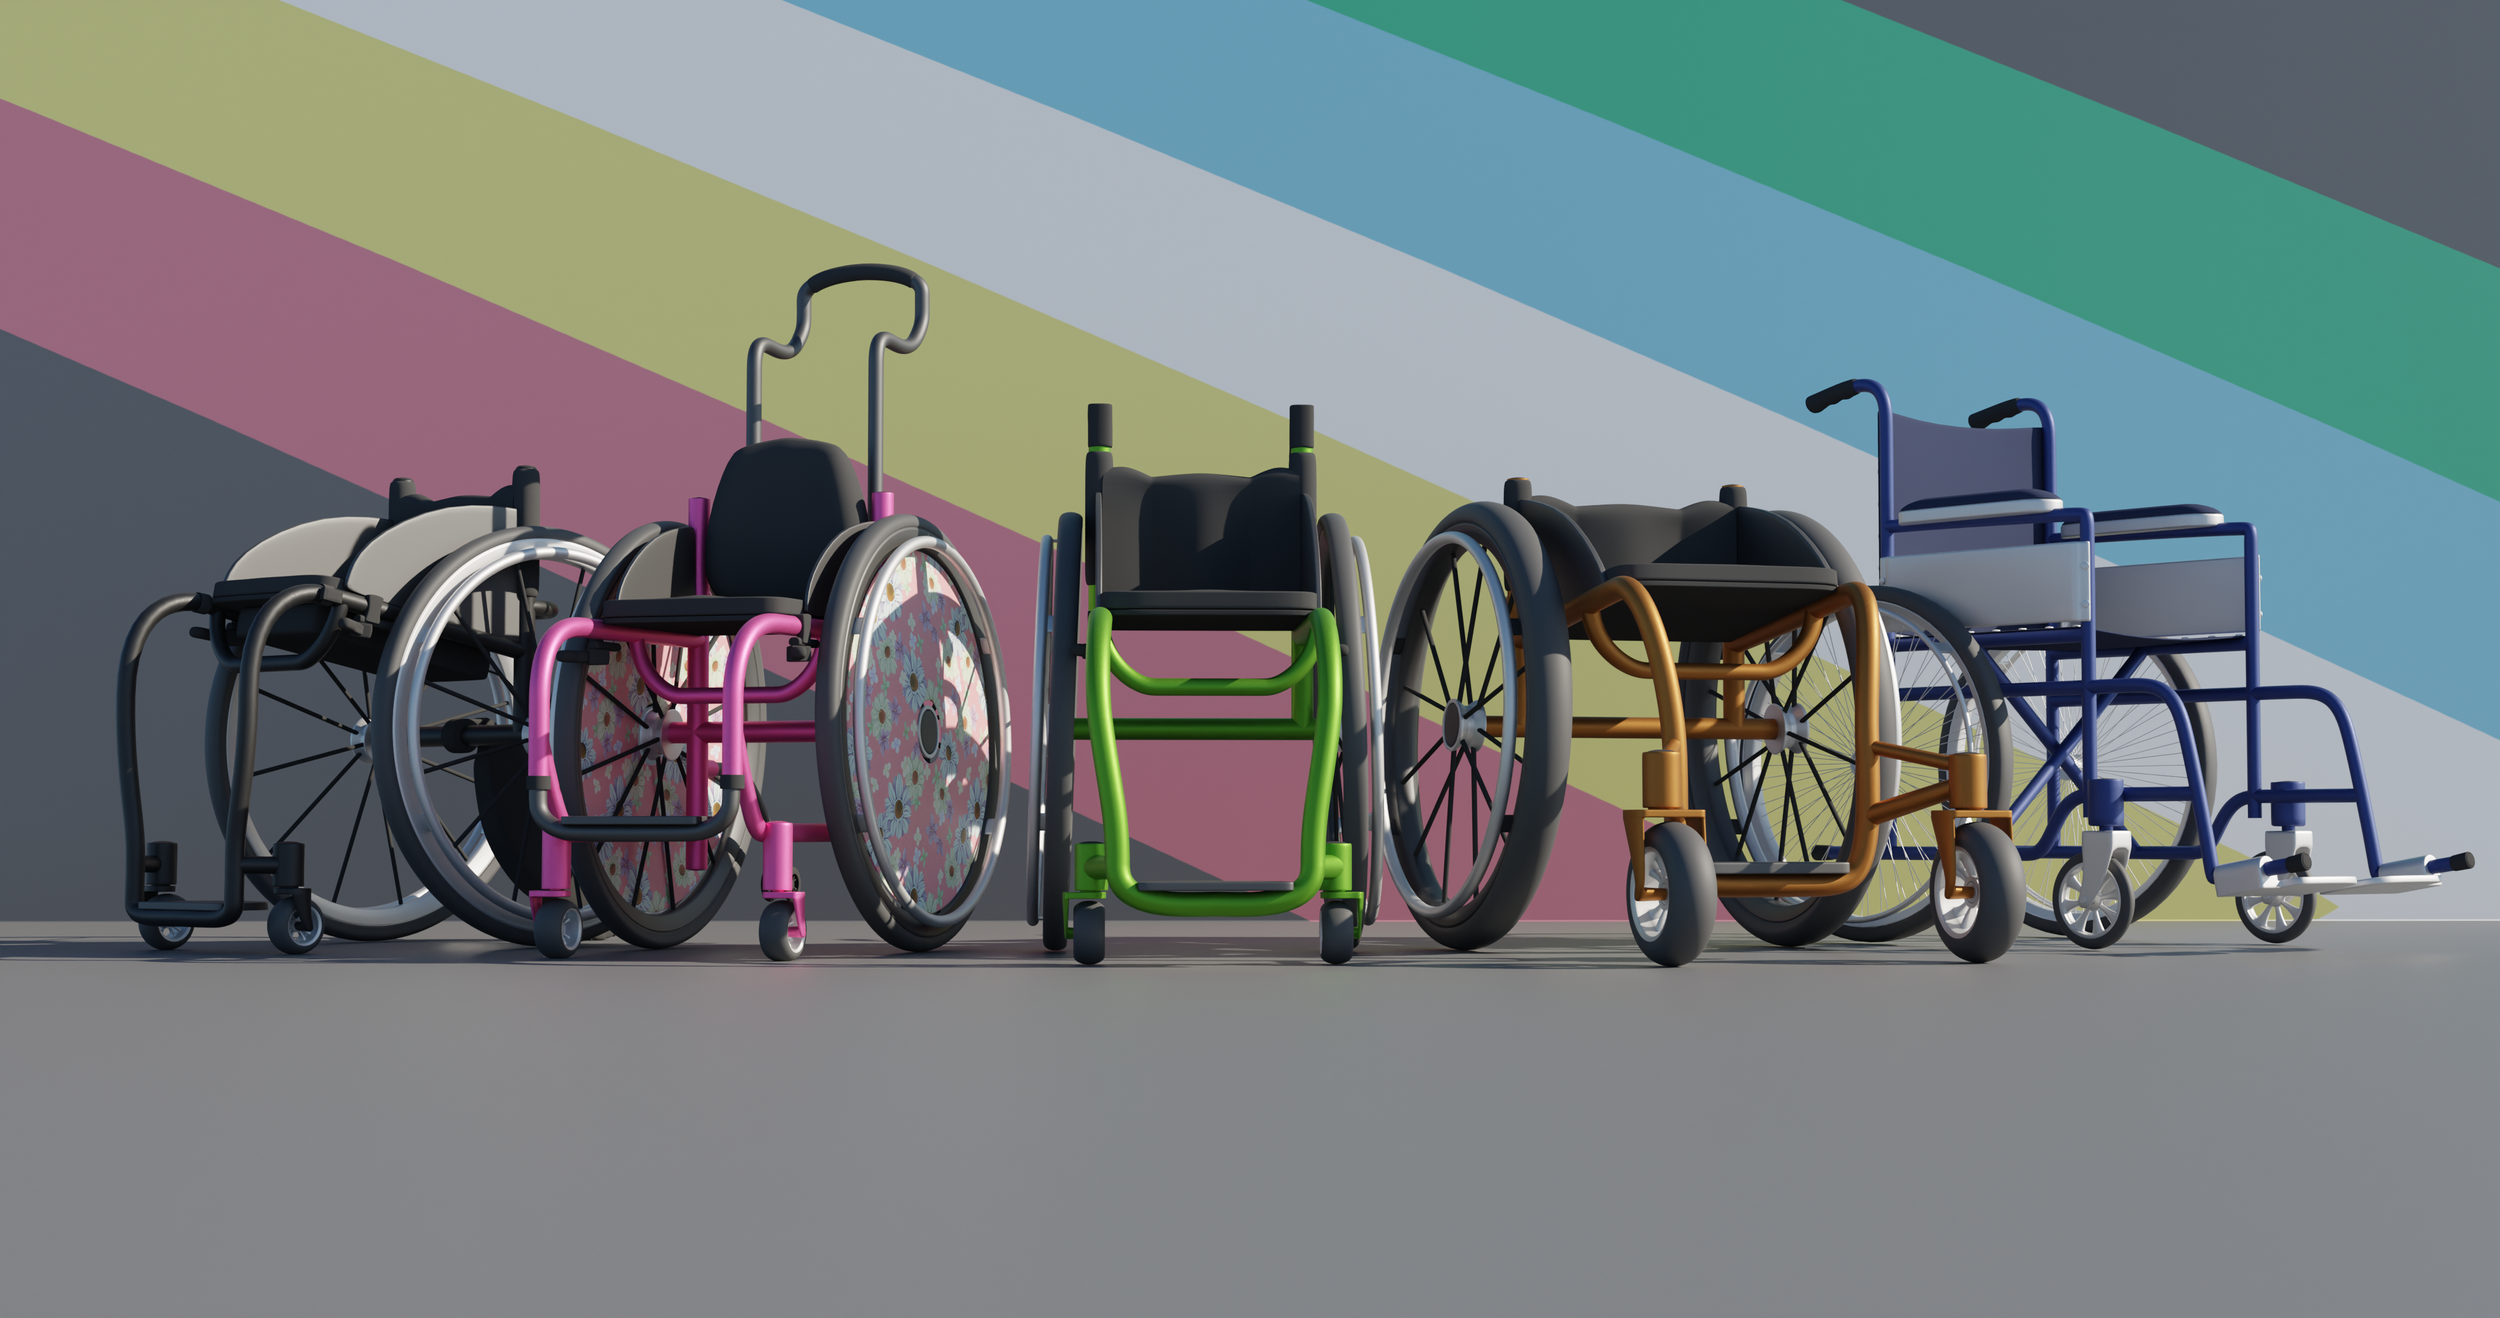
Thanks for downloading from My Wheelchair Reference Pack! The wheelchair models contained within were primarily made to be used as reference tools for artists who want to draw wheelchair using characters, but you are more than welcome to use the model itself and modify it as you please.
Each download contains 4 files:
A link to this page
A .Blend file
An OBJ file
an .MTL file
The .Blend file can be opened using Blender (which you can download for free from here, or on steam) and is the original model file that will allow you to make changes if needed.
The .OBJ and .MTL files are included so the file can be opened or imported into other programs, including some art and drawing apps or programs like Clip Studio Paint.
Using the .Blend Files
Once you have Blender downloaded, you can do pretty much whatever you’d like with the model, but here are some simple edits you can make if you’re not very familiar with Blender. I’ve tried to make as easy as possible for new users, but if you’ve never used blender before, the first 10 minutes of this tutorial will teach you everything you need to know to use these files.
Unfortunately, Blender is not available on mobile devices like Ipads, but you should still be able to use the .0bj files using the methods in the “Importing the models into drawing software” section.
Changing the Frame Colour
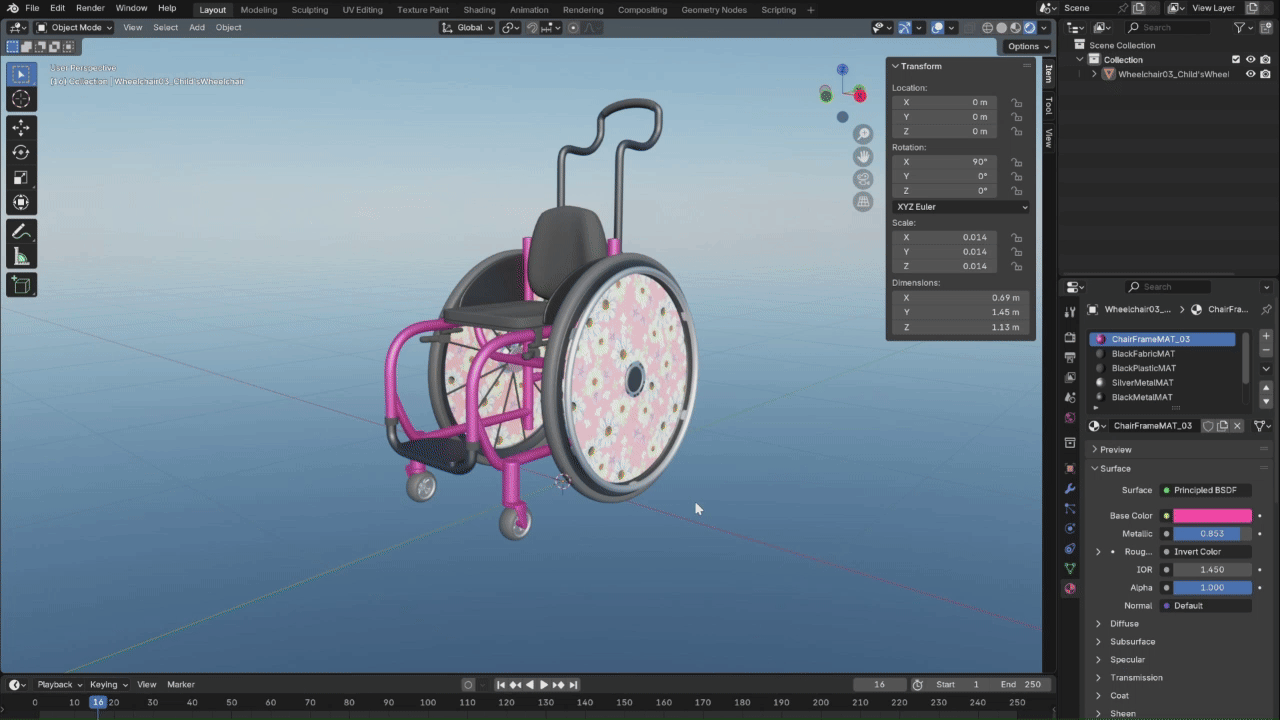
You can edit the colour of the wheelchair models using the material tab of the properties panel (in the bottom right corner of the screen). Each part of the wheelchair models have their own material, (basically, any segment that is a different colour is a different material) but let’s start by looking at the frame of the wheelchair.
Before we do anything, you need to change your 3D viewport from Solid view to either material or rendered view.
Solid view will display everything in grey, which can help give you faster performance but you won’t be able to see the colours applied.
Material view shows you how the model looks with the colours and textures applied, and Render mode, while the slowest view mode, will show you what everything looks like with lighting and effects applied (though there is no effects in this scene).
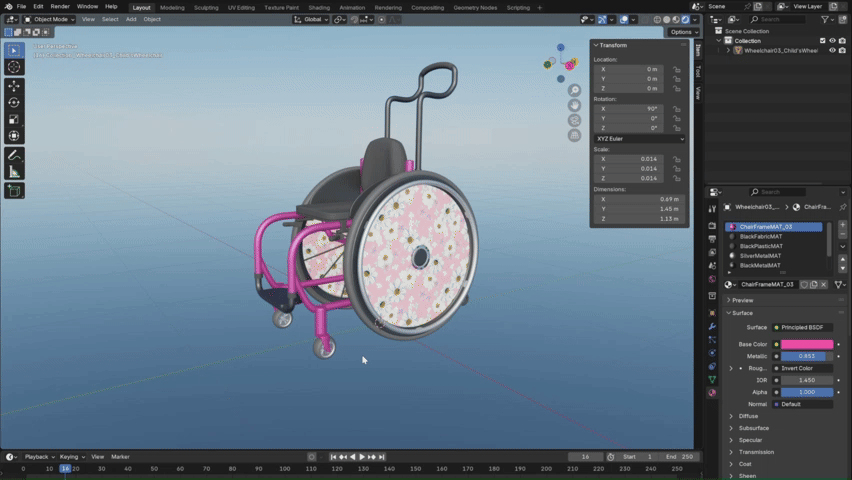
To change the view mode, go to the 4 circles in the top-right corner of the viewport. The rightmost circle is render view, the one to the left of it is material view, next is solid (by default, when you open the file, it will be highlighted blue) and on the leftmost side is Wireframe mode. Select one of the circles on the right to see the model’s colours and the changes we’re about to make.Once you’re in either material or render view mode, look to the panel in the bottom right. You should see a list in a dark grey box. The option at the top should be “ChairFrameMAT_[number]” (The number will be between 01 and 05, depending on which wheelchair file you’re looking at). Click on that.
Under the list, you’ll see a coloured box with the words: “Base colour” next to it. Click on the box and choose a colour. The frame of your wheelchair should change to match it!
You can do this for every item on that list. They all control the colour of different parts of the model!

Changing the texture (pattern) on the spoke cover
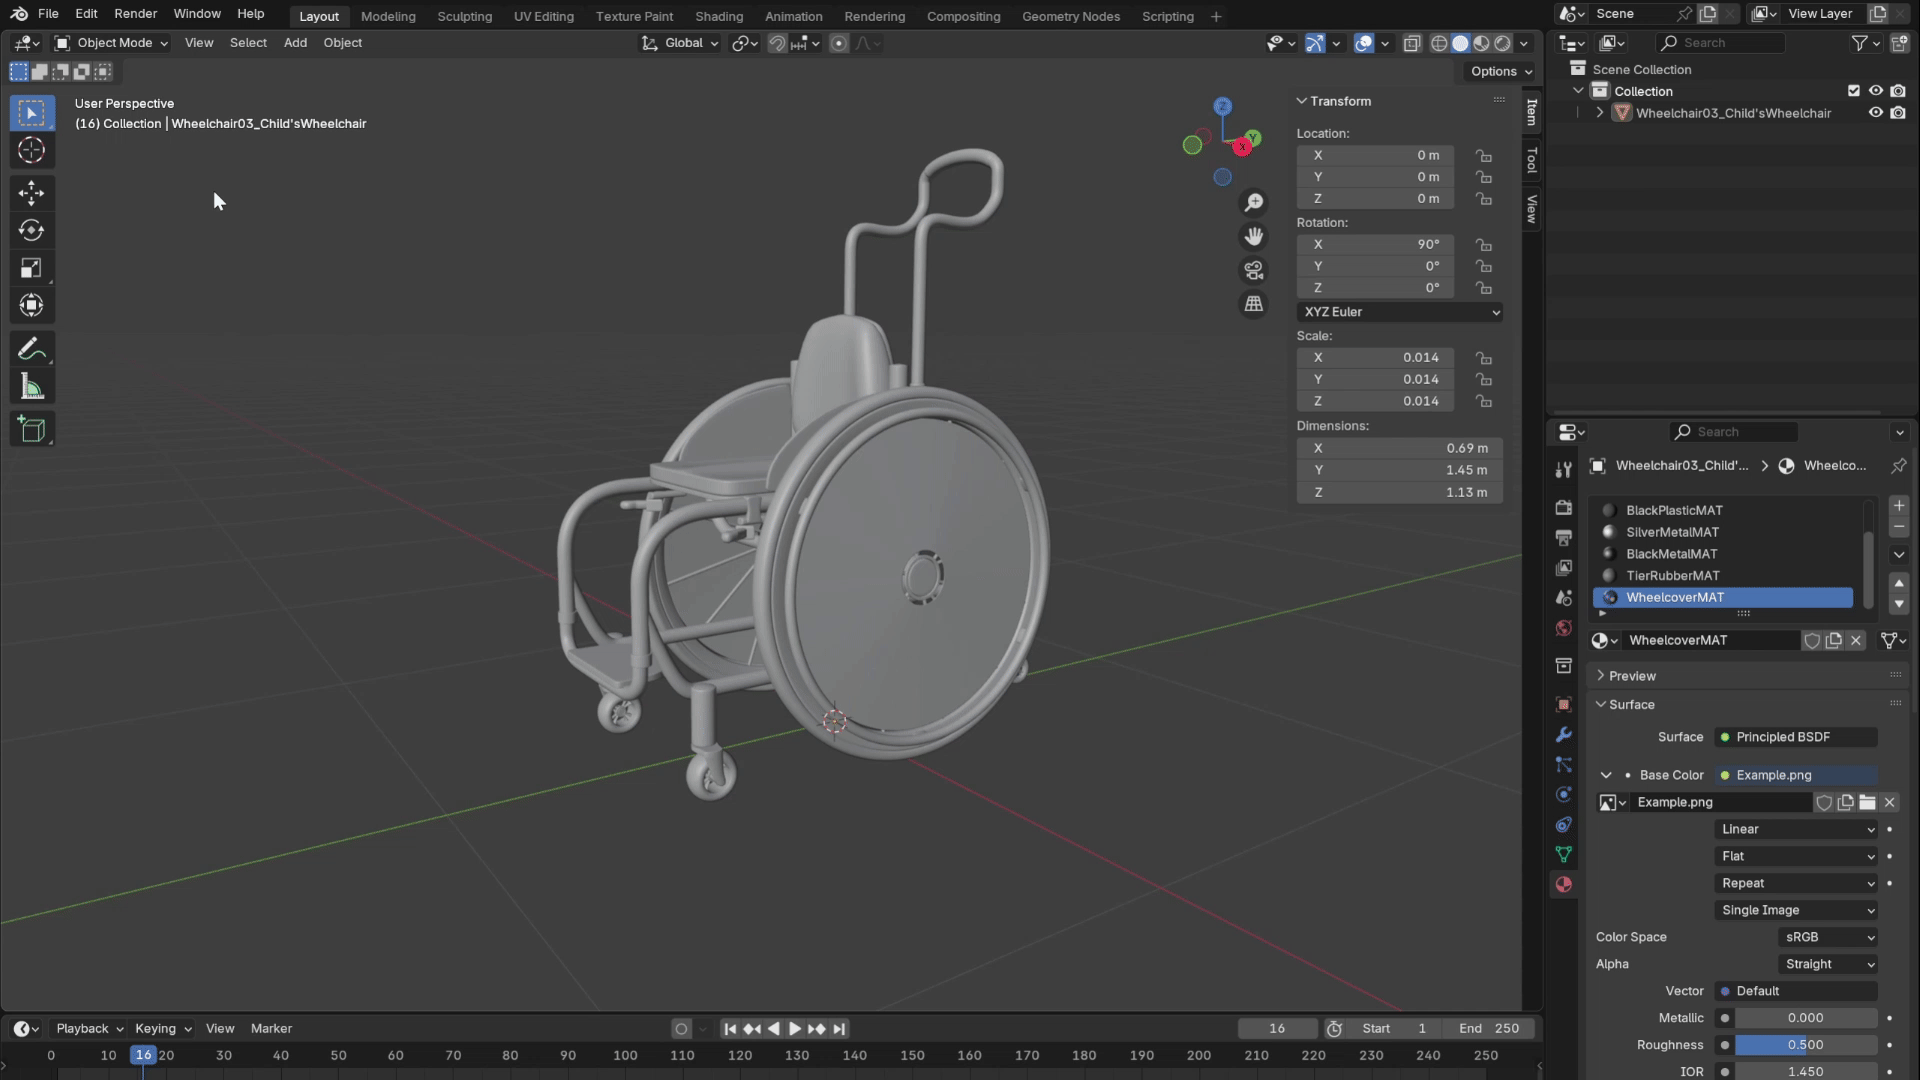
On the Children’s wheelchair (Wheelchair03-Child'sWheelchair_V02 in the complete pack) there is one exception to the above steps, and that’s the final material in that list: “WheelcoverMAT”. If you can’t see this material, hover your mouse over the grey box with the list and scroll down. The colour and patterns on this material is controlled by an image texture that can be swapped out for anything you want
Make sure you are still in material or render view mode
Click on the “WheelcoverMAT” material in the list.
Instead of a coloured box next to the “base Colour” option, you will see the words “SpokeCover_DIFF.png” and a dark grey box under it with the same text. Hold shift and click the X beside the box.
The box will be replaced with two buttons: “New” and “Open”. Click Open.
Find an image. Any image will work, but square ones work best. If you choose a rectangular image, it will be squished to fit.
Click the blue “Open image” button and that image will replace the flower pattern.
Exporting the Changes
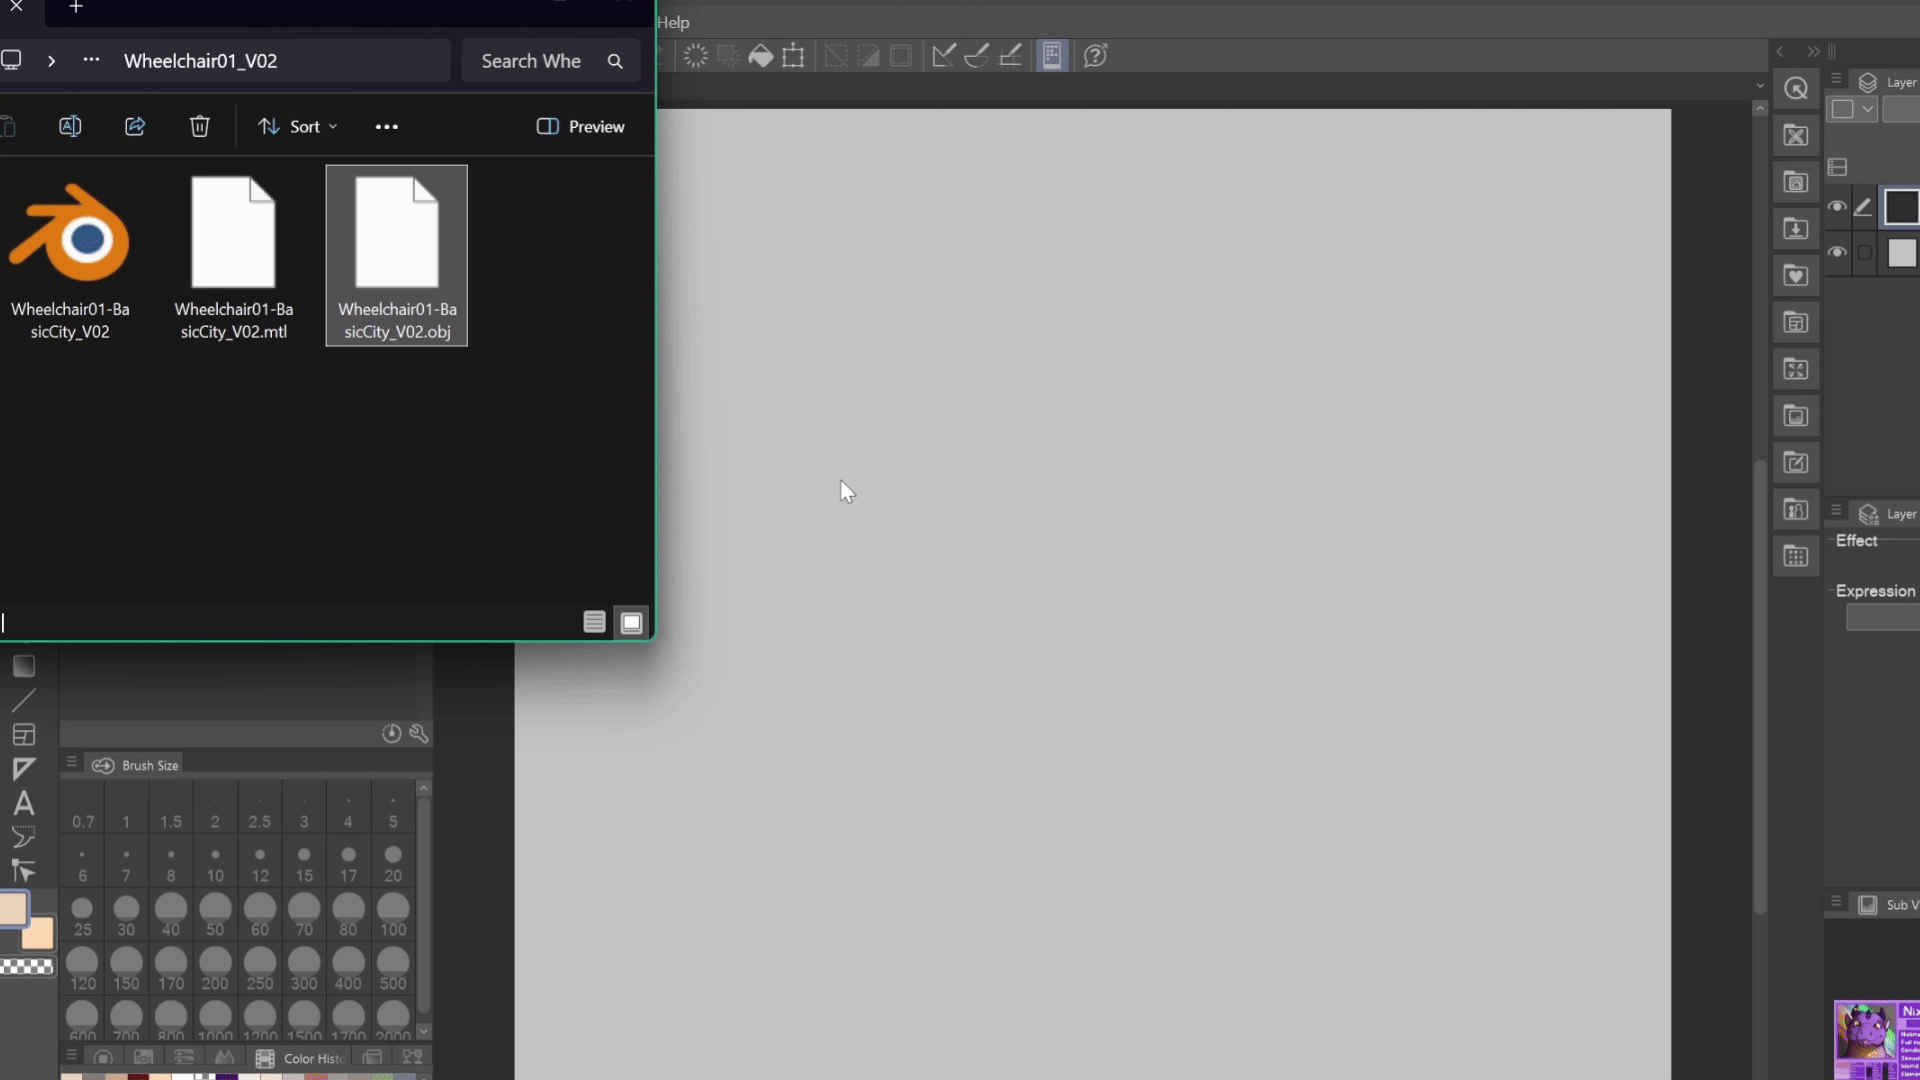
Once you’ve made the changes you want, click save, but to use the model with your changes in other programs, you’ll need to export the model to an .OBJ file.
Click File > Export > Wavefont (.obj)
Click on the origonal .obj file that came with your download. If it wasn’t already, the “name” box down the bottom will have changed from grey to red. This just means you’re going to overwright that file, which is what we want.
Look at the panel on the side and make sure the checkbox beside “Only selected” is unchecked, and the checkbox beside “PBR Extentions” is checked.
Click the blue “Export Wavefront .obj” box. If you’re running on a less powerful PC, Blender may stop responding at this point, but wait a few moments and it should unfreeze. Once it’s done a little blue pop-up will appear briefly along the bottom bar to tell you the model has been successfully exported. You’re now ready to import the file into other programs!
Importing the models into drawing software
Included in the download folder are .obj and .mtl files, which allow the models to be used by programs other than blender, such as art and drawing software. I personally use Clip Studio Paint so that is what I will use in this section, but any program that can read 3D files should be able to read the .obj file.
If you are using a different program that doesn’t support 3D referance files, you should be able to open the .obj in most 3D model viewers, take a screenshot and import that into your art file. If you’re on PC or Mac, Blender is probably the best program to use, but other options include CAD or Online 3D viewer. On Ipads or other mobile devices, some options include 3D Viewer and Nomad Sculpt. Procreate can also read .obj files, but as these models aren’t textured, they have some UV errors, which means they will display in procreate weirdly. I will try to fix this on a later update.
Importing the wheelchair models into the desktop version of Clip Studio Paint is very simple!
Extract (unzip) the downloaded folder and find the .obj file.
Open Clip studio paint and either create a new file or open an existing one.
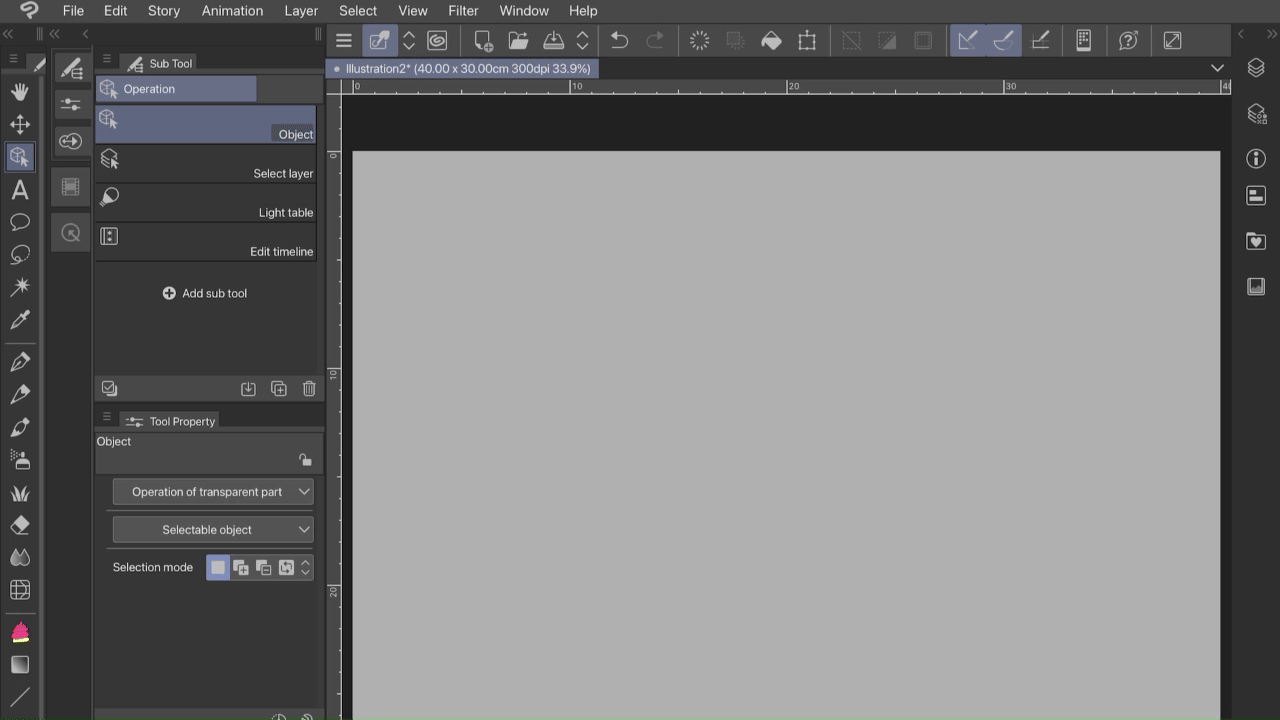
Click and drag the .obj file onto your canvas
OR
Go to File > Import > 3D Data (M) and find your .obj file.After a moment, the model will appear on your canvas. You can also import the default human models into the same scene so you can pose them with the wheelchair. All The chairs are scaled to be a little wider than the default human models, but otherwise be roughly the right proportions (The chairs are made to be wider to accommodate the average person, and the default models are a bit thinner than that).
If you want to save the model for easier access in CSP in the future, click and drag the layer containing the wheelchair model into the Materials tab and it will save it as an asset.
Note: The materials (colours) in CSP are quite a bit darker than in Blender. If they appear too dark on your screen, go to your “Tool Property” panel, click the wrench icon, find “light Source” and turn the “Directional Lighting intensity” up to somewhere between 2 and 4.
Importing to Clip Studio Desktop Versions
(PC, Mac and Linux)
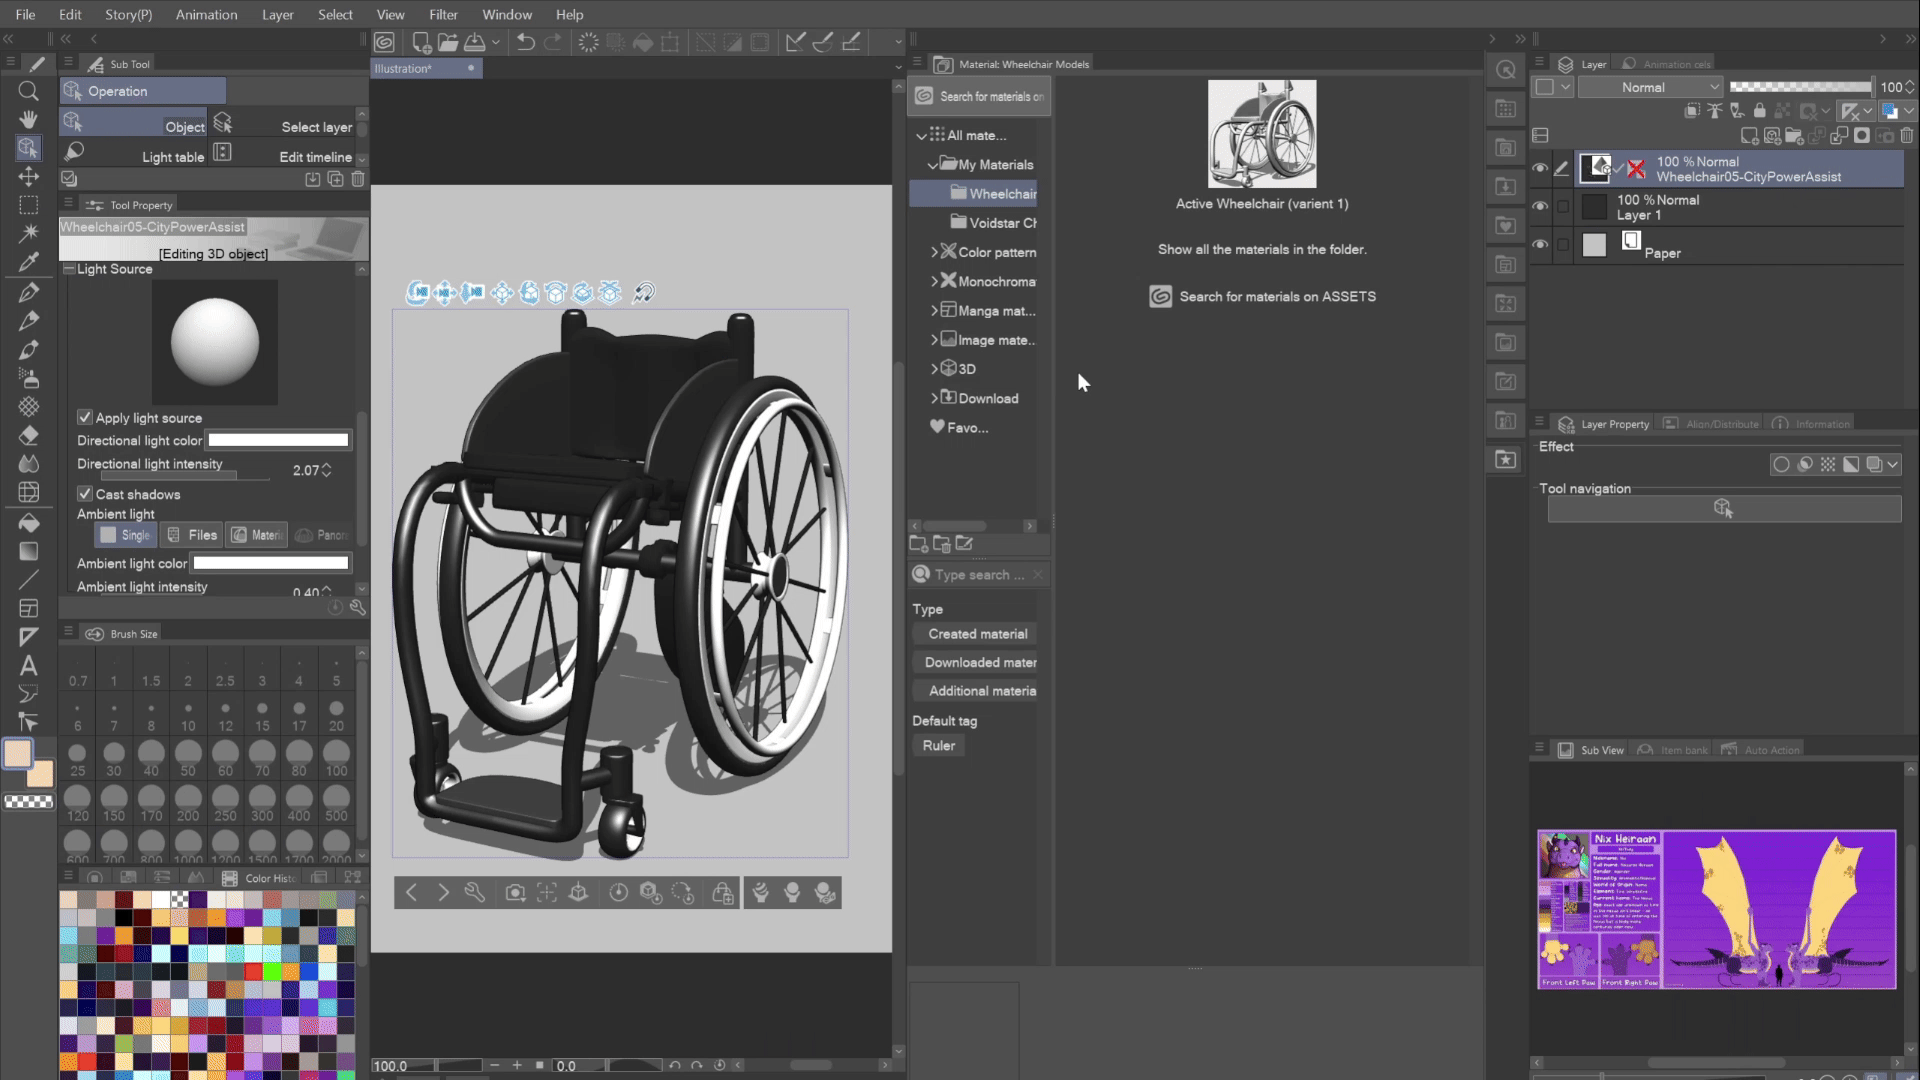
Importing these files into Clip Studio Paint on the ipad is mostly the same, but there are some extra steps to be mindful of.
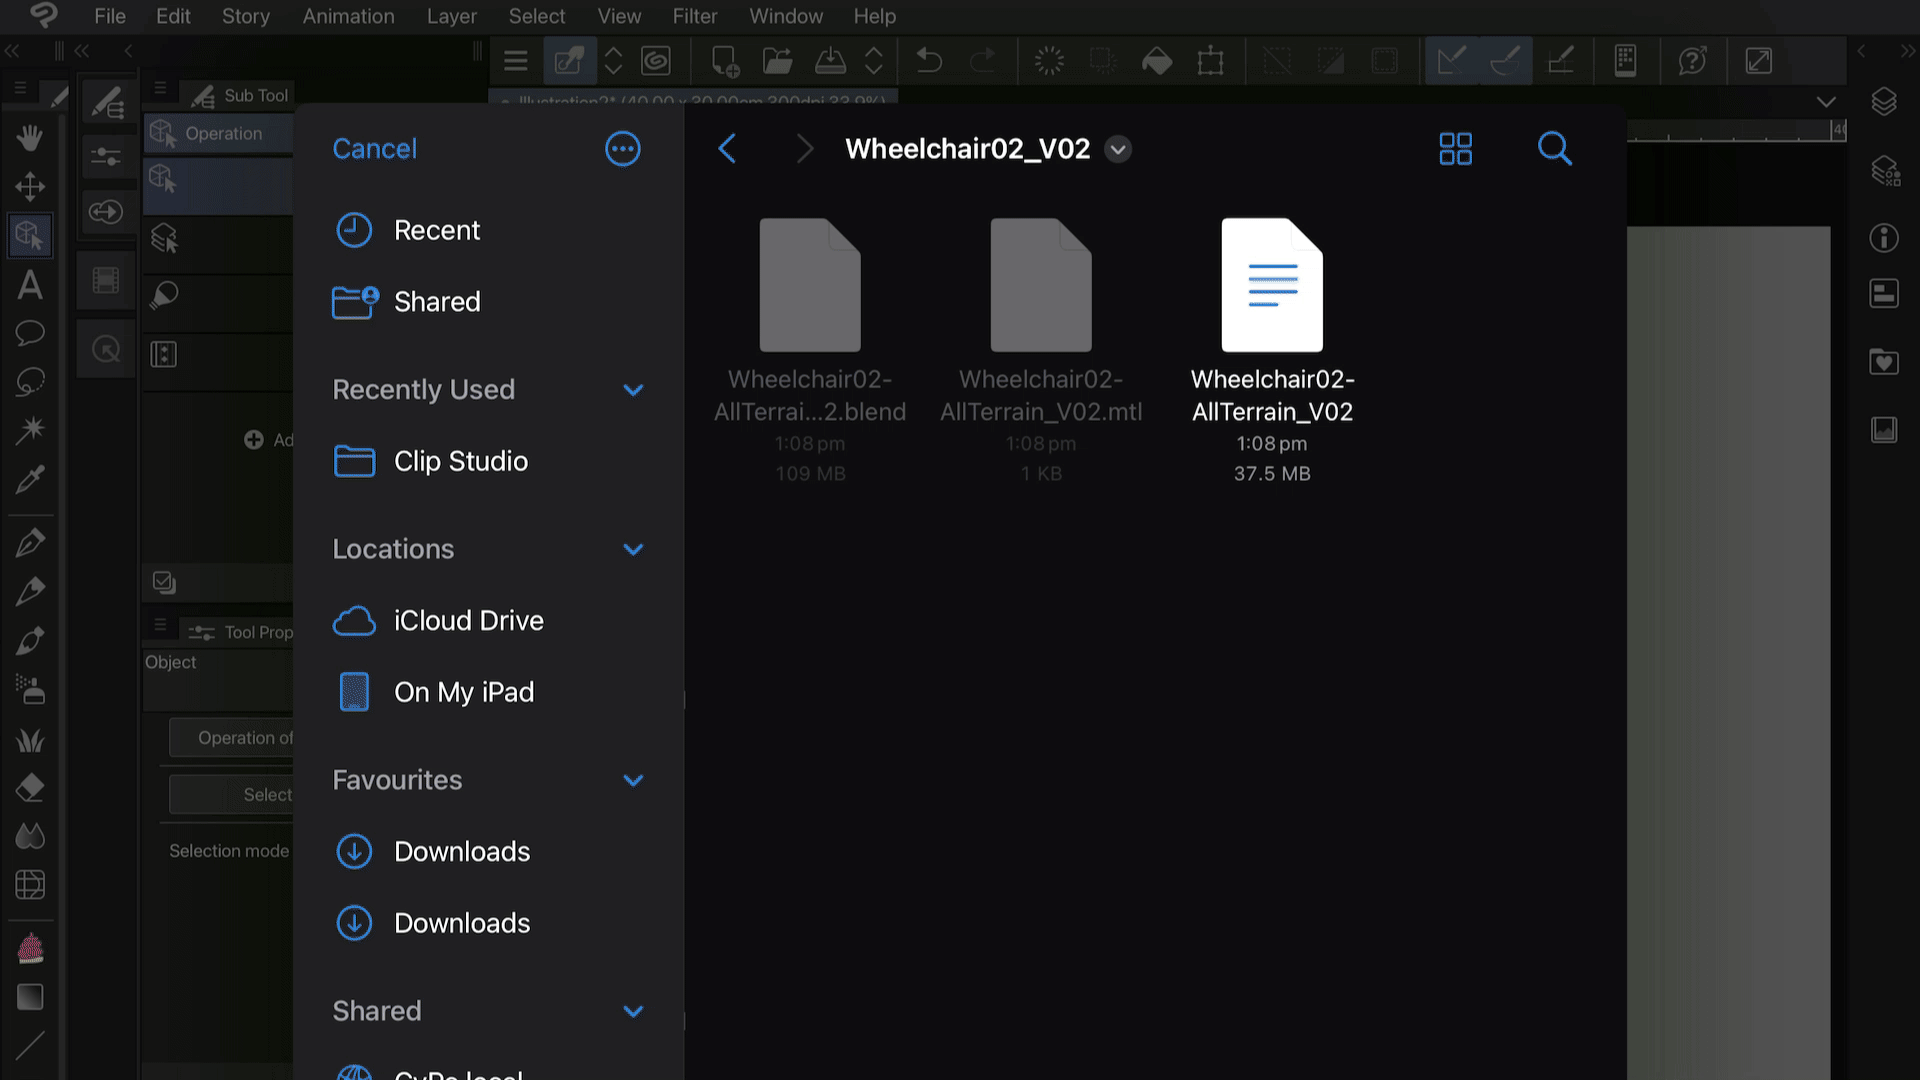
Using the “Files” app, find the downloaded ZIP file, then tap and hold until a menu appears with “decompress” as one of the options. This should create a folder with all the downloaded files in it, including the .obj files.
Open Clip studio paint and either create a new file or open an existing one.
Go to File > import > 3D Data and find the .obj file inside the new folder.
A pop-up will likely appear asking if this model contains multipe files. pressing “no” will just import the model with no colour or materials, so it will be grey. If that’s all you need, feel free to do that and skip to step 7. If you want the colour and materials to import though, press “yes”.
Depending on where you saved your files, Clip Studio Paint may give you another pop-up asking where the rest of the data for this file is, and if you have permission to access it. If you don’t get this pop-up, go to step 6. If you get this pop-up, press OK. I’ve noticed this only tends to happen when the files are saved on an external hard drive, a cloud drive (Like icloud) or on a local network server.
Another file window will open. Assuming you haven’t moved the .mtl file, don’t tap anything, just press “open” in the top right corner.
After a moment, the model will appear on your canvas. You can also import the default human models into the same scene so you can pose them with the wheelchair. All The chairs are scaled to be a little wider than the default human models, but otherwise be roughly the right proportions (The chairs are made to be wider to accommodate the average person, and the default models are a bit thinner than that).
If you want to save the model for easier access in CSP in the future, drag the layer containing the wheelchair model into the Materials tab and it will save it as an asset.
Note: The materials (colours) in CSP are quite a bit darker than in Blender. If they appear too dark on your screen, go to your “Tool Property” panel, click the wrench icon, find “light Source” and turn the “Directional Lighting intensity” up to somewhere between 2 and 4.